Monday, May 2, 2011

Pamper Yourself

My last few weeks have been engulfed by a new endeavor. After hosting a Pampered Chef party and seeing how much fun the parties are, I took the leap and became a consultant. I’ve spent the last couple of weeks testing out various recipes from the cookbooks and all the fabulous products I got for free as a host! My husband walks into the kitchen and asks, “You got that for free too???” I try not to be one who brags, but I can’t help but share all the items that I earned for free being a host! And all it cost me was the $20 worth of ingredients for the recipe the consultant prepared and some other snacks that I already had in my pantry. It’s hard to believe!


So – back to the cooking – I’ve cooked several dishes in my deep covered baker, and I hate to break the news to my husband, but I’ve fallen in love. I prepared a very hearty Rosemary and Chicken Soup as well as an All-American Pot Roast. Now I already have a pot roast recipe. My mom gave it to me, and it’s her interpretation of the recipe that my grandmother gave to her. It’s mouth-watering. The only problem is that it bakes for about 4 hours, so there is no way that this can be a weeknight dish. The Pampered Chef’s All-American Pot Roast only bakes for a couple of hours and has such a different flavor – incorporating wine and tomato paste in the sauce – that I have added it to my repertoire… by no means replacing my all-time favorite and now to be saved for weekends family recipe.

I used my rectangle bar stone 4 times this weekend… almost with every dish I made! The best part was how easy it was to wash off with just water and a washcloth. I used it to make some toasted baguette slices to use as dippers for a pizza dip on Saturday. On Sunday I used it to make a jelly roll, I used it for a cheesy artichoke appetizer, and I used it to baked some breaded chicken.

When I saw the jelly roll recipe, I tensed up. I like to bake… love it, even… but I have not had the best luck actually manipulating the cakes. I once volunteered to make two cakes for a surprise 30th birthday party for a family member. What was I thinking?? To add the icing on the cake (pun absolutely intended… I couldn’t help myself), it was in New Orleans – an hour from where I live. My mother had already warned me: cakes don’t travel well. They crack. But I thought I’d give it a go anyway.

What happened?? I mean, do I even have to say it? The cake starting cracking on the way, the icing slowly falling away from the cake, tears falling down my cheeks. (I know. I cry… Ask my husband about the time I tried to learn to drive a standard... Or ask my mother about the time I tried to paint. I like to succeed. What can I say?) So when I came upon the Cherry Almond Angel Roll recipe… the butterflies that fluttered in my stomach were even growling. I had no choice. Much to my surprise – and relief – the directions were perfectly written, and the products yielded perfect results. No cracking or crumbling to be seen.

Not only was it easy to do, but it looks very impressive to dinner guests when it’s complete. So, to all my stone owners, try it out! And if you don’t have one yet, this recipe is a fabulous reason to get one! If you want to impress your dinner guests or learn more about all the remarkable products by The Pampered Chef and how to get them FOR FREE (no really... did you not see the picture at the top of this post??) just let me know (eliseleboeufTPC@gmail.com).


Cherry-Almond Angel Roll

[From All the Best by The Pampered Chef]
Ingredients:

1 pkg (16 oz or 430-450 g) angel food cake mix
1/2 cup (125 mL) sliced almonds, chopped
1/2 cup (125 mL) powdered or icing sugar
1/2 cup (125 mL) cherry preserves
1 cup (250 mL) sour cream
4 cups (1 L) thawed, frozen whipped topping
1/2 tsp (2 mL) almond extract
2-4 drops red food coloring (optional)
1 pkg (3.3 oz or 102 g) white chocolate or vanilla instant pudding and pie filling


Directions:
 
1.Preheat oven to 350°F (180°C). Line Large Bar Pan with an 18-in. (45-cm) piece of Parchment Paper. Prepare cake mix according to package directions. Pour batter over parchment, spreading evenly. Sprinkle almonds evenly over batter. Bake 30-35 minutes or until top springs back when lightly touched with fingertip. Remove pan from oven.
 
2.Sprinkle sugar over cake. Place an additional piece of parchment over cake. Invert Stackable Cooling Rack over parchment. Carefully invert cake; remove pan and parchment from bottom of cake. Starting at short side, roll up cake in parchment, jelly-roll style. Cool completely.
 
3.Unroll cake and spread with preserves. In large bowl, combine sour cream, whipped topping, almond extract and food coloring, if desired; mix well. Add pudding mix; whisk until thickened. Spread filling over cake to within 1 in. (2.5 cm) of edge; roll up cake. Refrigerate at least 30 minutes.

Sunday, April 3, 2011

Pavlova: "feel the promise of SQUIDGINESS beneath your fingers..."

To all my dieting friends, I am going to apologize ahead of time (but don’t worry I didn’t forget about you). This week’s post is about a yummy, cool dessert, perfect for the steadily warming weather.

It’s actually a very light dessert because in it’s simplest form it is just a meringue.  Because I enjoyed this Food Network Magazine dessert recipe so much, and because it showcased an important dessert cooking technique – making a meringue – I thought it would be a good one for the blog.

A couple of things that are important to remember about meringues… make sure that whatever bowls and mixing accessories you’re using are thoroughly washed and dried. Any leftover particles or bits of water may cause the meringue to not peak up. Also, most meringues require a bit of salt or of cream of tartar (in the seasoning section at the grocery store) to help keep it peaked. As for the egg whites, be careful that you don’t accidentally get any bits of yolk in them. I recommend separating one at a time into a separate bowl before pouring it into the mixing bowl so as to not accidentally ruin what you’ve already put in the mixing bowl if you drop a piece of shell or yolk into it.

Now don’t be afraid of leaving it to whip for too long because it will probably seem like too long if it’s the first time you’ve made a meringue, but you want to make sure that when you lift the beaters out the meringue stays up in the position the beaters were last in. This is what is called “stiff peaks forming”.

This particular recipe also calls for balsamic vinegar, which is naturally a sweet product.  [This note is for my dieting friends.] Balsamic vinegar actually makes a good sweetener for strawberries rather than sugar or an alternative sweetener. It adds a bit of sweetness with a little bit of a different flavor.


Now this particular dessert – called a pavlova – is impressive looking once it’s put together and basically comes out as a deliciously moist cake. It’s a must-try for any chocolate fan (You know who you are. You probably see me at the meetings. J), but it’s not too chocolately. It actually calls for dark chocolate and unsweetened cocoa powder, which adds a little bit of healthiness to it compared to milk chocolate; however, the whipped up heavy cream goodness that goes on top kind of ruins and hopes of low fat or low calories. Just save it for your splurge day!

This dessert is what I Zumba for:


[From Food Network Magazine]

Ingredients
For the Meringue Base:
6 large egg whites
2 cups superfine sugar
3 tablespoons unsweetened cocoa powder, sifted
1 teaspoon balsamic or red wine vinegar
2 ounces dark chocolate, finely chopped

For the Toppings:
2 cups heavy cream
4 cups raspberries (I used strawberries instead.)
1 to 2 ounces dark chocolate

Directions
Prepare the pan: Preheat the oven to 350 degrees F and line a baking sheet with parchment. Draw a 9-inch-diameter circle on the paper with a pencil, tracing a round cake tin that size.
Flip the paper over so your meringue doesn't touch the pencil marks - you'll still be able to see the circle.
Make the meringue: Beat the egg whites with a mixer until satiny peaks form, and then beat in the sugar a spoonful at a time until the meringue is stiff and shiny.
Add the chocolate: Sprinkle the cocoa, vinegar and then the chopped chocolate over the egg whites. Gently fold everything with a rubber spatula until the cocoa is thoroughly mixed in.

Shape the meringue: Secure the parchment to the baking sheet with a dab of meringue under each corner. Mound the meringue onto the parchment within the circle, smoothing the sides and the top with a spatula.

Bake the meringue: Place in the oven, then immediately turn the temperature down to 300 degrees F and cook for one to one and a quarter hours. When it's ready, it should look crisp and dry on top, but when you prod the center you should feel the promise of squidginess beneath your fingers. [Yes, the recipe actually said squidginess!]
Let it cool: Turn off the oven and open the door slightly; let the chocolate meringue disk cool completely in the oven. When you're ready to serve, invert onto a big flat-bottomed plate and peel off the parchment.
Decorate the Pavlova: Whisk the cream till thick but still soft and pile it on top of the meringue, then scatter the raspberries on top. Coarsely grate the chocolate haphazardly over the top so that you get curls of chocolate rather than rubble, as you don't want the raspberries' luscious color and form to be obscured. You want the Pavlova to look like a frosted cake.


Sunday, March 27, 2011

Trust your gut! And eat good risotto!

Today I was reminded twice of one very important cooking rule: the recipe is not always right!

Coincidentally, both of these pleasant reminders came as slightly undercooked ingredients.
The first was in my 15-minute prep meatloaf – a bacon-Gruyere meatloaf from Real Simple magazine that requires very little hands-on time. The most time I spent was on grating the Gruyere cheese, which is quickly becoming one of my favorite to cook with.

The issue here was when the oven called my name, saying, “Elise… time to take the meatloaf out,” the meatloaf was still clearly undercooked. I’m always very paranoid about undercooking meat (a seldom-occurring quality, as I’m generally calm as a toad in the sun… J), so when my instant-read thermometer read 140 instead of 160, I knew it needed to go back in. Twenty minutes later of checking on it every five minutes, I came to my very calm executive decision--- Screw it! If it’s not done now, we’re eating it row! Lucky for my dinner guests, it was done and delicious.

My second reminder that the times listed on recipes aren’t always correct occurred in dish number two: Risotto with Butternut Squash, Leeks, and Basil. The recipe called to sauté the squash for 5 minutes or until starting to soften and brown. After 8 minutes, I used the tried and true fork test and thought it wasn’t quite done but that the rest of the cooking process would soften it up a little. When it was all done and time to serve and the squash was the same texture, I wished I had listened to my gut. While my kind dinner guests said that the squash were good, there were some pieces that were a little crispier than I’d like. Because I didn’t cut them all the exact same size, the larger pieces were a little underdone. So, as you all should when you find something about a recipe you’d like to change, I made a note on the recipe.

So today let’s raise our glasses to one of the most important cooking rules:

Go with your gut!


[from Real Simple magazine]

Ingredients
            1 1/2 pounds ground beef chuck
            1/4 cup bread crumbs
            1/4 cup ketchup, plus more for serving
            1 small red onion, coarsely grated
            2 slices bacon, chopped
            2 cloves garlic, chopped
            1 large egg
            3/4 cup grated Gruyère or Cheddar (3 ounces)
            kosher salt and black pepper
            2 tablespoons olive oil

Directions

Heat oven to 400° F. In a medium bowl, combine the beef, bread crumbs, ketchup, grated onion, bacon, garlic, egg, ½ cup of the Gruyère, ½ teaspoon salt, and ¼ teaspoon pepper. Transfer the mixture to an 8-by-4-inch loaf pan and sprinkle with the
remaining ¼ cup of Gruyère.

Roast the meat loaf until cooked through, 40 to 45 minutes. Pour off any accumulated fat and let rest 10 minutes before slicing.

Slice the meat loaf and serve with additional ketchup.


[From Bon Appetit magazine]


Ingredients
3 tablespoons olive oil, divided
4 cups 1/2-inch cubes peeled butternut squash (from 2 1/4 pounds squash)
3 cups 1/2-inch-wide slices leeks (white and pale green parts only)
1 tablespoon chopped fresh thyme
2 cups arborio rice
4 14-ounce cans (or more) vegetable broth
1 cup chopped fresh basil
3/4 cup freshly grated Parmesan cheese, plus additional for serving

Directions

Heat 2 tablespoons oil in heavy large pot over medium-high heat. Add squash and sauté until beginning to soften and brown around edges, about 5 minutes. Transfer squash to medium bowl.


Reduce heat to medium; add remaining 1 tablespoon oil, leeks, and thyme to same pot and stir until tender but not brown, about 5 minutes. Add rice and stir 1 minute. Add 1 cup broth and simmer until absorbed, stirring frequently, 3 to 4 minutes. Add remaining broth by 1/2 cupfuls, allowing each addition to be absorbed before adding next, stirring often, about 15 minutes. Return squash to pot. Continue to cook until rice is just tender but still very creamy, stirring gently and often, about 10 minutes longer (about 25 minutes total cooking time). Remove from heat. Stir in basil and 3/4 cup freshly grated Parmesan cheese. Season to taste with salt and pepper. Transfer to large bowl and serve with additional Parmesan cheese.

Sunday, March 20, 2011

... And it was all yellow (Shrimp dinner leftover turned alfredo pasta)

So let’s see if I completed my Mardi Gras checklist:
Get a sunburn?... Check!
Get to the parade route 2 hours before the parade actually started?.... Check!
Stand bundled up under and umbrella in the rain waiting for a parade?... Check!
Pick up the random doubloons left all around the house by my Mardi Gras obsessed husband?... Check!
At least you can’t say that I’m not dedicated…

Now that I’ve had time to recuperate after two weeks of South Louisiana fun, it’s back into the kitchen! 

This Friday, Vandebilt Regiment’s Band Boosters hosted a shrimp boil and, lucky me, I got four dinners!! (What can I say? I’ve got connections. ahem…thanks, Mom…ahem) I’m one of those people who prefer shrimp in dishes rather than just boiled, so while my husband was chowing down on his two trays, I decided to incorporate mine into a pasta dish. And don’t you worry, there was no waste. I incorporated all the items in the dinners into a dish.

My theme was yellow. (Really my theme was using whatever I happen to have in the refrigerator, but we’ll just pretend like my theme was yellow.) I sliced up some summer squash; they’re small right now, but still tasty. I julienned a yellow bell pepper from my tri-colored pepper pack. I cut the corn off the cob from the shrimp dinner. And off I went…


I keep a couple of things in stock for nights like this when I just want to whip up a quick pasta dish, such as heavy cream and Parmesan cheese. You can also use half & half, or a low-fat alternative is low-fat milk and nonfat evaporated milk with a tablespoon of flour to thicken it up.

The basic strategy for a veggie-included creamy pasta dish is as follows:

1.   If you’re including a protein, have it seasoned, cooked, and ready to go before you start. In my case, the lovely parents of the Vandebilt Band Boosters took care of that step for me.
2.     Set your pasta to boil. When you drain you pasta, reserve some of the boiling water. This is the best liquid to use to thin out the sauce if you need to after you’re done cooking. It helps the sauce stick to the pasta, versus regular water which would not work as well.
3.     Cook down the veggies (onions, peppers, squash, garlic, or whatever you feel like) in some butter or olive oil.  Get them to the consistency that you like them to be when you eat them.
4.     Add in any veggies that are already cooked (peas, corn, etc.) and add your cream/milk mixture. Let it thicken up if you’re using a thickening agent such as flour or cornstarch.
5.     Add any cheese you’d like, such as parmesan, and add your seasonings (parsley, salt, and pepper… maybe some thyme for all the veggies… but this part is really up to you).
6.     Toss with your drained pasta, adding some of the reserved boiling water as you see fit.

This is my basic strategy, but I’ll post for you exactly what I did last night with measurements below. 

So I used the shrimp and the corn; the only thing leftover were the potatoes – one of my favorite parts of a seafood boil and somehow always the part there are leftovers of. With my leftover shrimp boil potatoes, on Saturday for lunch I made mashed potatoes. The potatoes were already boiled, but not quite enough to cream them the way I like, so I peeled them and quartered them, then boiled them for another 5 minutes. After draining them, I added some evaporated milk and melted butter and used a hand-mixer to blend them to my desired consistency (which is creamy with no lumps), adding evaporated milk as needed to reach that desired consistency. I added salt to taste, but it didn’t require much because they had the flavor from the shrimp boil already incorporated. So next time, don’t let those potatoes go to waste. Stick them in the refrigerator for mashed potoatoes later in the week!


Don’t forget to comment and let me know what you think or how yours turned out!

Shrimp Alfredo with Yellow Vegetables
Ingredients:
8 ounces fettuccini pasta
¼ cp margarine
¼ cup chopped onion
1 clove garlic, minced
2 small summer squash, sliced thin
1 yellow bell pepper, julienned
½ cup corn
1 cup heavy cream
½ cup grated parmesan cheese, plus additional for serving
2 tablespoons chopped parsley
2 teaspoons thyme
salt and ground black pepper, to taste

Directions:

1.     Cook fettuccine according to package directions; drain and keep warm, reserving boiling liquid for sauce adjustment.

2.     While pasta is cooking, melt butter in large skillet over medium heat. Add onion and garlic; cook, stirring occasionally, 3-4 minutes or until onion is tender. Increase heat to medium-high; add squash and yellow pepper. Cook, stirring frequently, 5-6 minutes or until crisp tender (or until it has reached your desired consistency).

3.     Stir in corn and cream; cook 1-2 minutes, or until heated through, but do not boil. Stir in Parmesan cheese, parsley, thyme, salt and ground black pepper. Toss with drained fettuccine. Sprinkle with additional Parmesan cheese if desired. Use the reserved liquid to thin out sauce if necessary.

Sunday, February 13, 2011

Playing hard to get


Lasagna. A classic, right? Everybody has her own way to make it. Personally, I still swear by my mother’s recipe. I’m not sure what it is, but I love it, and it’s my husband’s favorite dish, so I don’t think I’ll be veering away from that if I’m going for the basic. I do, however, like to try different varieties on lasagna, in particular vegetable lasagna’s. I’ve made one with spring veggies – zucchini, squash, eggplant, and the like. But flipping through my new Southern Living Ultimate Christmas Cookbook that Santa brought me, I came across another vegetable variety – Roasted Vegetable Lasagna. I thought this would make a good choice for tonight’s post because it calls for several vegetables that require specific prep.

First is the squash. Butternut squash to be exact. Now as you may realize from the frequency of squash in my posts, I’ve got quite a crush on squash. Squash, however, likes to play hard to get. It’s not as easy as peel, chop, and go like the sweet potatoes in this dish (winter squash, that is). No, squash makes you work before it’ll warm up to you. In fact, warming the vegetable up is one of the best ways to make it easier to work with. I’ve read that boiling it for several minutes works. The downside of that is that it makes too hot to handle immediately. I’ve also heard that baking it for a bit will soften the skin for peeling and the flesh for dicing. This method, however, takes a lot of time, as you have to preheat the oven and then bake it for a good while. My most recent attempt – and most successful – is to just microwave it on high for two minutes. It doesn’t leave it too hot to touch, and it just takes two minutes.
Next come leeks. They look like huge green onions, but they actually work just the opposite. For green onions, it’s the dark green leafy part that you want. For leeks, you want the white part. Slice it like an onion all the way up until the green part, then rinse.

The last prep tip that I’ll leave you with is for garlic. Most people that I know just used the precut garlic in the giant jars, but if you’re working with a recipe that calls for whole garlic (as this one does) or if you’re stuffing something with garlic, then buying it fresh and peeling it yourself is the way to go. I find pushing down on it with the flat side of your knife just enough to hear that crush sound makes the paper peel off easily and allows the flavor to more easily be drawn from the garlic itself.

So now that you’re prepped to prep, get out your chopping knife and cutting board and give this winter lasagna a try. My husband wished it had meat. (What can I say? He’s a man.) But it was a very filling vegetarian white-sauced twist on the Italian classic. Comment and let me know what you think!

Roasted Vegetable Lasagna

Ingredients:
1 medium butternut squash (about 2 pounds)
½ large sweet potato, cut into ½” cubes (about 1 cup)
3 tablespoons olive oil, divided
3 cups sliced leaks (about 5 medium)
1 red bell pepper, cut into thin strips
4 cups milk
4 garlic cloves, halved
3 tablespoons butter or margarine
¼ cup all-purpose flour
1 teaspoon salt
½ teaspoon pepper
9 dried precooked lasagna noodles
1 cup grated Asiago cheese
1 cup whipping cream
½ cup grated Parmesan cheese

Directions:
1.     [Microwave butternut squash at high 2 minutes to soften.] Cut squash in half lengthwise, remove and discard seeds. Peel squash, and cut into ½” cubes. Set aside 3 cups cubed squash, reserve any remaining squash for another use.
2. Combine 3 cups, squash, sweet potato, and 2 tablespoons olive oil on a large rimmed baking sheet. Bake at 450° for 10 minutes. Combine leeks, bell pepper, and remaining 1 tablespoon olive oil in the large bowl. Add to partially roasted squash mixture, stirring gently. Bake at 450° for 20 minutes or until vegetables are tender, stirring after 15 minutes. Return roasted vegetables to bowl, set aside.
3.     Combine milk and garlic in a large saucepan. Bring just to a boil. Reduce heat, and simmer, uncovered, 10 minutes. Remove and discard garlic.
4. Melt butter in a large saucepan over medium heat, whisk in flour until smooth. Cook 1 minute, whisking constantly. Gradually whisk in warm milk, cook over medium-high heat, whisking constantly, 12 to 13 minutes or until slightly thickened. Remove from heat, stir in salt and pepper. Add to roasted vegetables, stirring gently.
5. Spoon 1 cup vegetable mixture into a lightly greased 13”x9” baking dish. Top with 3 lasagna noodles; spread half of remaining vegetable mixture over noodles, and sprinkle with ½ cup Asiago cheese. Repeat procedure with 3 noodles, remaining vegetable mixture, and remaining Asiago cheese. Break remaining 3 noodles in half and lay on top of casserole. (Breaking the noodles keeps them from curling up.). 
6. Beat cream at high speed with an electric mixer until soft peaks form. Spread whipped cream over noodles, sprinkle with Parmesan cheese. Bake, covered, at 350° for 30 minutes. Uncover and bake 13 more minutes or until golden and bubbly. Let sit 15 minutes before serving.


Sunday, February 6, 2011

There's no wrong way to eat a Reese's


I originally had something else planned for today’s entry [apple crisp – a perfect dessert for the cold nights we’ve been having], but yesterday I made a childhood favorite candy for a group of friends at a poker game, and it was such a hit I thought I’d share it.

This recipe for homemade Reese’s comes from a cookbook my family put together in 1992. Everyone in the family participated. At 4 years old, my contribution was riveting.

Peanut Chip Cookie
[by Elise Michel, age 4]

Ingredients:
6 chocolate chip cookies
Creamy peanut butter

Directions:
Spread creamy peanut butter on the top of each cookie and eat.

I know. Impressive, right?


When I grew a few years older, one of my favorite snacks was the Reese’s bars that my Aunt Julie made. I remember one New Year’s Eve sneaking back into the kitchen for more conveniently not asking mom if it was OK to have another… and another… and another.
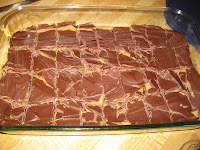
When I made this treat yesterday, it literally took 15 minutes to put together. So when you’re looking for a low-effort crowd pleaser for kids and adults alike, give this one a shot.

Remember, there’s no wrong way to eat a Reese’s.


Reese’s Bars

[by Julie Michel]

Ingredients:

1 cup peanut butter

1 stick oleo

2 cups powdered sugar

1 (8 oz.) bar Hershey’s chocolate [I used chocolate chips (milk chocolate).]


Directions:

Combine peanut butter, powdered sugar, and soft oleo. [You may have to add a little more powdered sugar. You want it to be a thick consistency, so that it's sticking to itself more than to the sides of the bowl.] 

Pat in 9x13 inch pan. Melt chocolate over boiling water and pour over mixture. [I have a handy dandy pampered chef microwave bowl that is perfect for melting butter and chocolate quickly and easily.] 

Chill in refrigerator [until the chocolate is solid again] and cut in squares.


Tip for measuring out sticky stuff: When I'm baking with sticky/greasy things like peanut butter, Crisco shortening, and other similar ingredients, I use the back of the spoon to scoop them out. It still allows to get it out quickly, but makes it easy to scrape it off on the side of the measuring cup.


Sunday, January 30, 2011

Song, song of the south. Sweet potato pie and I shut my mouth.


Tuesday marks the beginning of National Potato Lovers Month (not to be confused with National Potato Month, which is September). Yes, I know. Google nerd alert!  As we toe the threshold of this less than well-known holiday, I’m going to focus on a particular potato that calls Louisiana home – the sweet potato.

The sweet potato actually has two varieties. One type, found in the North, are white-fleshed and drier than the second type, which is grown mostly in Louisiana. This second version is probably the one you’re more familiar with. I grew up calling them yams and refusing to taste them. [Yams actually have brown or black skins and off-white, purple or red flesh, depending on the variety. The African slaves of the Old South thought Louisiana sweet potatoes were reminiscent of this veggie, called nyami in an African dialect and, thus, shortened to yam.]

Even the ones baked with marshmallows on top didn’t make it to my taste buds until last year when I started off with sweet potato fries and realized what I’d been missing out on all my life. Since then I take them anyway I can find them. Baked. Mashed. French Fried. In a casserole. In the slow cooker. In a pie. Call me the Bubba Gump of sweet potatoes.

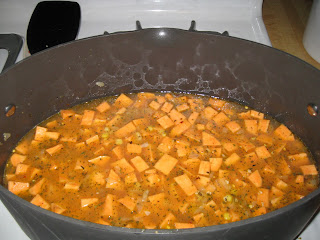
To pair with the Croque Monsieur and Brussels sprouts of last week’s blog, I added another version of sweet potatoes to my recently developed repertoire. Sweet potato bisque. As many of you know, I’m a huge fan of buying in season due to the price factor, but I’m also a supporter of local businesses, so cooking with sweet potatoes is a win-win!

This particular recipe will stay on my short list of soups because it is super easy to make, inexpensive, and yummy! It also is lighter than your usual bisque because it only requires ½ cup of heavy cream, using apple juice and chicken broth to fill it out, and of course the sweet potatoes add thickness.

Jen's Sweet Potato Bisque

[By: Janet Johnston on Food Network]

Ingredients

  • 1 tablespoon butter
  • 1 tablespoon olive oil
  • 1/2 small onion, diced
  • 2 cloves garlic, minced
  • Salt and freshly ground black pepper, for seasoning, plus 1 1/2 teaspoons salt
  • 1 cup frozen corn, thawed
  • 1 1/2 pounds sweet potatoes, peeled and diced
  • 2 cups chicken broth
  • 2 cups apple juice
  • 2 teaspoons poultry seasoning (recommended: Savory Spice Shop s Sage and Savory Stuffing Seasoning) [I use Paul Prudhomme's Poultry Magic]
  • 1/2 teaspoon finely ground white pepper
  • 1/8 teaspoon ground allspice
  • 1/8 teaspoon cayenne pepper
  • 1/2 cup heavy cream

Directions

Add butter and oil to a large saucepan over medium-high heat. Once the butter foams, add the onion and garlic and saute until soft, about 3 to 4 minutes. Season with salt and pepper, to taste. Add the corn and cook for 1 more minute.
Add the sweet potatoes, chicken broth, apple juice, 2 teaspoons seasoning, white pepper, remaining 1 1/2 teaspoons of salt, allspice, and cayenne. Bring to a boil, then reduce the heat and simmer until the potatoes are cooked through and fork tender, about 20 minutes.
Use an immersion blender and puree the bisque until smooth. Taste for seasoning, then stir in the heavy cream. Rewarm over low heat.