Sunday, January 30, 2011

Song, song of the south. Sweet potato pie and I shut my mouth.


Tuesday marks the beginning of National Potato Lovers Month (not to be confused with National Potato Month, which is September). Yes, I know. Google nerd alert!  As we toe the threshold of this less than well-known holiday, I’m going to focus on a particular potato that calls Louisiana home – the sweet potato.

The sweet potato actually has two varieties. One type, found in the North, are white-fleshed and drier than the second type, which is grown mostly in Louisiana. This second version is probably the one you’re more familiar with. I grew up calling them yams and refusing to taste them. [Yams actually have brown or black skins and off-white, purple or red flesh, depending on the variety. The African slaves of the Old South thought Louisiana sweet potatoes were reminiscent of this veggie, called nyami in an African dialect and, thus, shortened to yam.]

Even the ones baked with marshmallows on top didn’t make it to my taste buds until last year when I started off with sweet potato fries and realized what I’d been missing out on all my life. Since then I take them anyway I can find them. Baked. Mashed. French Fried. In a casserole. In the slow cooker. In a pie. Call me the Bubba Gump of sweet potatoes.

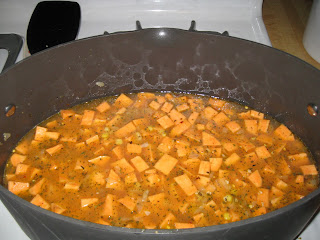
To pair with the Croque Monsieur and Brussels sprouts of last week’s blog, I added another version of sweet potatoes to my recently developed repertoire. Sweet potato bisque. As many of you know, I’m a huge fan of buying in season due to the price factor, but I’m also a supporter of local businesses, so cooking with sweet potatoes is a win-win!

This particular recipe will stay on my short list of soups because it is super easy to make, inexpensive, and yummy! It also is lighter than your usual bisque because it only requires ½ cup of heavy cream, using apple juice and chicken broth to fill it out, and of course the sweet potatoes add thickness.

Jen's Sweet Potato Bisque

[By: Janet Johnston on Food Network]

Ingredients

  • 1 tablespoon butter
  • 1 tablespoon olive oil
  • 1/2 small onion, diced
  • 2 cloves garlic, minced
  • Salt and freshly ground black pepper, for seasoning, plus 1 1/2 teaspoons salt
  • 1 cup frozen corn, thawed
  • 1 1/2 pounds sweet potatoes, peeled and diced
  • 2 cups chicken broth
  • 2 cups apple juice
  • 2 teaspoons poultry seasoning (recommended: Savory Spice Shop s Sage and Savory Stuffing Seasoning) [I use Paul Prudhomme's Poultry Magic]
  • 1/2 teaspoon finely ground white pepper
  • 1/8 teaspoon ground allspice
  • 1/8 teaspoon cayenne pepper
  • 1/2 cup heavy cream

Directions

Add butter and oil to a large saucepan over medium-high heat. Once the butter foams, add the onion and garlic and saute until soft, about 3 to 4 minutes. Season with salt and pepper, to taste. Add the corn and cook for 1 more minute.
Add the sweet potatoes, chicken broth, apple juice, 2 teaspoons seasoning, white pepper, remaining 1 1/2 teaspoons of salt, allspice, and cayenne. Bring to a boil, then reduce the heat and simmer until the potatoes are cooked through and fork tender, about 20 minutes.
Use an immersion blender and puree the bisque until smooth. Taste for seasoning, then stir in the heavy cream. Rewarm over low heat. 


Sunday, January 23, 2011

I Gotta Feelin'


            Since I started working in August, I’ve worked to hone my lunch prep plan.

First try: Healthy Choice Fresh Mixers. They don’t require refrigeration like frozen Lean Cuisine meals, they’re quick to prepare, and they actually taste pretty good for pre-made lunches. The problem? They’re about 3 bucks a pop, which makes them slightly out of my price range.

Second try: Whatever happened to be leftover in the fridge. Good in theory price-wise, but didn’t quite work out because our dinner menu isn’t steady enough to guarantee that we’ll always have leftovers in the fridge. So I was back to square one.

Finally, I decided to turn to my mother’s method with a twist. Why I waited so long to follow her advice, I have no idea. So what’s the ingenious method? Simple: Cook a big pot of something delicious. Freeze it in lunch-size portions. Whenever you need something for lunch, grab something out of the freezer and voila! The good thing about Mom’s method is that if you start with enough things frozen then you can have something different every day!

My problem? Patience. Because I’m starting fresh, I don’t have enough of a variety already frozen. And of course I don’t have the patience to cook one item a week and get that variety built up. I do, however, have one thing on my side. I don’t mind eating the same thing for lunch every day for a week. So I use Mom’s method, but I just alter it a little. Cook a big pot of something delicious. Put lunch-size portions into leftover bowls and put in the refrigerator. Bring one to work each day for lunch.

This week, I’m cooking Black-eyed Pea Gumbo, a dish that my sister made for New Year’s Day lunch.  This dish, like most of the dishes I choose as week-long lunch dishes, is super-easy to do. It’s not often you find a successful recipe with only 3 steps! Chop all your basic cooking veggies in a quick chopper/food processor. Cook them down in olive oil. Then add all the canned goods and let it cook for 45 minutes. Can’t get much easier than that, and it makes a really good soup-like dish that we served over rice. Another prep step I learned from my mom is to cut up and freeze the basics (like bell peppers, celery, green onions and the like) so that when it comes time to cook, all you have to do is throw them in there. It makes a super-simple recipe super-quick.

The third benefit of this particular dish (aside from ease and tastiness) is price. For a half recipe, which made five portions (enough for the work week) with some extra for a couple of weeknight suppers or for a couple of lunches for my husband, the supplies easily add up to less than $10.  That’s 7 meals for less than $10.

So if you’re looking for something quick, easy, inexpensive, and flavor-rich, give this recipe a shot! Let me know what you think.

Black-Eyed Pea Gumbo


Ingredients:
1 tablespoon olive oil
1 medium onion, chopped
1 medium green bell pepper, chopped
5 stalks celery, chopped
2 cups chicken broth
1 cup brown rice [I used white rice, and I didn’t cook it with the soup. Following my sister’s lead, we just served it over whatever rice you prefer  in gumbo style.]
4 (15-ounce) cans black-eyed peas with liquid
1 (10-ounce) can diced tomatoes and green chiles [With the half recipe, we just did this and left off the next ingredient. It gave it a little added kick.]
1 (14.5 ounce can diced tomatoes)
2 cloves garlic, finely chopped

Directions:
1. Heat the olive oil in a large saucepan over medium heat, and cook the onion, pepper, and celery until tender.
2. Pour in the chicken broth, and mix in rice [Again we didn’t do this step. We just served over cooked rice, but to each his own.], black-eyed peas with liquid, diced tomatoes and green chiles, diced tomatoes, and garlic.
3.  Bring to a boil, reduce heat to low, and simmer 45 minutes, or until rice is tender. Add water if soup is too thick.

Sunday, January 16, 2011

Paris holds the key to your heart (... or your stomach)


Anticipation. 

Ever since my husband put in his request about a month ago for Brussels sprouts, the anticipation has been slowly building… along with the doubt. [I’ll admit, probably more doubt that anything else.] Tonight it finally made it to the table. And I learned a lot about Brussels sprouts in the process: for example, the spelling and thus its origins. Although now it seems obvious, I never knew that Brussels sprouts are a Belgium produce (and hence the name Brussels sprouts with a capital B and an s). I was also surprised to learn that Brussels sprouts are in the cabbage family. In fact in French – one of the languages spoken in Belgium – Brussels sprouts are called choux de Bruxelles or Brussels cabbage. Now that I’ve shared my random culinary encyclopedic information, I’ll move on to the actual cooking.

While the dish itself [My Brother Brussels – a Guy Fieri dish] was technically successful and looked appetizing, it turns out that I’m not a fan of this particular choux. I’ll give you the recipe in case you happen to like Brussels sprouts or want to give them a shot, but I don’t think I’ll be saving it in my recipe collection.

The rest of the meal, however, was extremely successful. (I know… I need to work on my modesty.)  An involuntary and proud (or should I say haughty?) “yum” slipped through my lips at the first bite of the other recipe I’m going to share with you today. A classic Parisian café dish – Croque Monsieur – is basically a twist on grilled ham and cheese. Using Gruyere cheese and a béchamel sauce with a sourdough exterior. The dish was frequently ordered on both my trips to the City of Lights however I’d never quite worked up the courage to make it myself. Turns out that it’s as easy to make as it is to eat! Although the Gruyere is a little more pricey than your everyday cheese, if you get it from Sam’s it’s much more reasonable.

This French classic has many variations, including the most popular Croque Madame, which is basically a Croque Monsieur with a fried egg on top. Give this dish a shot in its original form or make it your own. And let me know if that “yum” slips out. 

The rest of the meal included an easy-to-do and easy-to-freeze soup as well as a very pretty dessert. We'll save those for another post another day. But until then... bon appetit!

(By Guy Fieri)

Note: One benefit of this recipe, even if your anti-Brussels sprouts, is that it can be adapted to fit a variety of veggies. My mom suggested green beans. My husband recommended zucchini. I’m thinking maybe asparagus. It’s a good recipe… even if the Brussels sprouts part of it isn’t to my taste.
Ingredients
2 teaspoons salt
¾ pound Brussels sprouts, ends trimmed, loose leaves removed
½ pound bacon, thinly cut into 1/4-inch pieces
1 ½ cups diced yellow onion
2 tablespoons unsalted butter
1 teaspoon freshly cracked black pepper
¼ cup grated Parmesan, for garnish [I used Pecorino Romano because it’s what I had on hand.]

Directions
Fill a large pot 3/4 of the way with water and add 1 teaspoon of salt and the Brussels sprouts. Put the pot over high heat and bring to a boil. Let boil until the Brussels sprouts are just fork tender about, 8 to 10 minutes. Remove from the heat, drain the sprouts and transfer to an ice bath. Let cool completely, then drain and set aside.

Cut the Brussels sprouts into 1/4-inch lengthwise slices and set aside. Add the bacon to a medium sauté pan, and cook until just crisp, then remove to a paper towel lined plate to drain. Adjust heat to medium-high, add the onions to the pan and sauté until they are translucent and just beginning to caramelize, about 5 or 6 minutes. Add the butter to the pan, then add the Brussels sprouts and sauté for 3 to 4 more minutes. Season with the remaining 1 teaspoon of salt and 1 teaspoon of pepper. Transfer to a serving bowl or platter and sprinkle with the reserved bacon and the cheese. Serve immediately.


(By Ina Garten/the Barefoot Contessa)

Ingredients

2 tablespoons unsalted butter
3 tablespoons all-purpose flour
2 cups hot milk
1 teaspoon kosher salt
1/2 teaspoon freshly ground black pepper
Pinch nutmeg [You guessed it! I left this out.]
12-ounce block of Gruyere, grated (makes 5 cups)
1/2 cup freshly grated Parmesan
16 slices white sandwich bread, crusts removed [I only made six sandwiches with the same amount of cheese sauce.]
Dijon mustard
8 ounces baked Virginia ham, sliced but not paper thin

Directions
Preheat the oven to 400 degrees F.

Melt the butter over low heat in a small saucepan and add the flour all at once, stirring with a wooden spoon for 2 minutes. Slowly pour the hot milk into the butter–flour mixture and cook, whisking constantly, until the sauce is thickened. Off the heat add the salt, pepper, nutmeg, 1/2 cup grated Gruyere, and the Parmesan and set aside.

To toast the bread, place the slices on 2 baking sheets and bake for 5 minutes. Turn each slice and bake for another 2 minutes, until toasted.

Lightly brush half the toasted breads with mustard, add a slice of ham to each, and sprinkle with half the remaining Gruyere. Top with another piece of toasted bread. Slather the tops with the cheese sauce, sprinkle with the remaining Gruyere, and bake the sandwiches for 5 minutes. Turn on the broiler and broil for 3 to 5 minutes, or until the topping is bubbly and lightly browned. Serve hot.

Sunday, January 9, 2011

Tout les matins il achetait son petit pain au chocolat

While my blog persona revolves around culinary adventures, my day job is teaching French to elementary students. While food is a passion of mine (I know. I know… Understatement of the millennium), I share equally as much zeal for everything French – the language, the culture, and (surprisingly enough) the food. I’m sure many of you have had experience with some French dishes (tasting them, if nothing else). Au gratin (potato, seafood, or anything else you can think of), quiche, Dijon mustard, crêpes, ratatouille, and the list is infinite… This particular dish is not one that I had ever heard of before coming across the recipe in Food Network Magazine.


Vegetable Tarte Tatin
Since I made the dish, I’ve twice come across apple tarte tatins on dessert menus, but my dish was served as a side dish. Not only is this recipe delicious, but it is also beautiful! I’ll admit that presentation of food isn’t my forte, but you can’t but this dish look impressive. The colors alone make it exceptional. This dish, however, is not a super-simple weeknight menu as many of the dishes I share are. The first time I made it, it took four tries and a full hour and a half for me to make the caramel portion, but once I did some research (and made a frustrated phone call to my mom), I found the trick – medium heat and patience.


So to make this delectable winter veggie dish, when you get to the part where you need to make the caramel, follow these instructions:
 Heat a small to medium skill on medium heat.
  Add the required amount of sugar (no water yet!)
  Let it cook. It will take a while, probably 10 minutes, before it starts to melt and turn to caramel. Keep an eye on it and when it begins to melt/brown, begin to slowly and occasionally stir until it is all melted and looks like caramel.
-  Take it off the heat and SLOWLY and a bit at a time add the required amount of water, stirring constantly.


So next time you’re looking to impress with a delicious and fabulous-looking side dish, give this one a try. You won’t be disappointed.


Ingredients
2 medium Yukon gold potatoes, peeled and cut into 1/2-inch-thick rounds
2 medium sweet potatoes, peeled and cut into 1/2-inch-thick rounds
2 medium parsnips, peeled and cut into 1/2-inch-thick rounds
1 small onion, cut into 1/2-inch-thick rounds
4 cloves garlic, halved
3 tablespoons extra-virgin olive oil
Kosher salt and freshly ground pepper
3/4 cup sugar
1 tablespoon white wine vinegar
1 tablespoon small fresh sage leaves
1 tablespoon fresh oregano leaves
6 ounces mozzarella, grated (about 1 cup)
1 8.5-ounce sheet frozen puff pastry, thawed
All-purpose flour, for dusting

Directions
Preheat the oven to 400 degrees F. Toss both kinds of potatoes, the parsnips, onion, garlic, olive oil, 1 teaspoon salt and ¼ teaspoon pepper in a bowl. Spread in a single layer on a baking sheet; bake until tender, about 45 minutes. Let cool slightly.

[The following few sentences, in italics, are the directions on making caramel that I altered. I recommend referring to the above directions.] Meanwhile, mix 2 tablespoons water and the sugar in a skillet and bring to a boil over medium heat. Cook, swirling the pan, until amber, about 7 minutes. Remove from the heat and stir in the vinegar and ¼ teaspoon each salt and pepper. Pour the caramel into a 9-by-13-inch glass baking dish and spread with a rubber spatula. Sprinkle the sage and oregano on top.

Arrange the roasted potatoes and parsnips in a single snug layer on top of the caramel. Scatter the onion and garlic over the roasted vegetables; sprinkle evenly with the mozzarella.

Roll out the puff pastry on a lightly floured surface into a 9-by-13-inch rectangle. Pierce the pastry all over with a fork, then lay it on top of the mozzarella, folding the edges under to fit, if necessary. Bake 20 minutes, then reduce the oven temperature to 350 degrees F and continue baking until the dough is cooked through, 15 to 20 more minutes.

Let the tart cool 10 minutes in the baking dish, then carefully invert it onto a cutting board. Replace any vegetables that stick to the dish, if necessary.

Sunday, January 2, 2011

What do you say to taking chances?

I am a recipe cook.

My theory is that I can cook anything as long as I find the right recipe. I can skim down the list of ingredients and imagine the flavors developing into a delicious dish. I practically get whiplash from turning my head so often while cooking to glance back at a recipe. Even with my chocolate chip cookies— which I’ve probably made a million times in the last 7 or 8 years – I always pull out the recipe and carefully follow its directions, knowing that in baking, precision is key.

This Christmas break, I stepped outside of my recipe-driven box and cooked two dishes sans recipe. Of course I spent more time than my pride allows me to admit researching what recipes were out there, considering what they had in common and the basic premise of each dish. Who am I kidding? I'm not that brave. I chose my own ingredients, amounts, and cooking times to make a local favorite, Cajun Meat Pies, and a New Year’s Day necessity, Smothered Cabbage.

First were the meat pies. As I searched for recipes for meat pies, I found a great deal of variety. Whole pies or individuals? Baked or fried? Potatoes or none? Premade or homemade dough? Decisions decisions. Some of the questions really were no question at all. Individual pies are a must, and – according to my meat-pie-loving husband – potatoes are a no-no. As for the other questions, I decided to try them both. Go big or go home, right?

My New Year’s Eve guests like both the baked and the fried, with a preference for the crispiness of the fried. For my health-conscious readers, baked would of course be the better option. 

As for the dough, I used two types: refrigerated pre-made pie crust dough and pizza dough mixed in my bread machine following the instructions as given in the bread machine manual. These produced two very different results. The refrigerated pie crust was thinner, crisped up nicely in the fryer, and made for a prettier pie because a large amount of flour wasn’t required to keep it from sticking as I rolled it out. The homemade pizza dough, however, had good taste and made for a “breadier” meat pie. Again, each type had its fans, but in trying out this recipe yourself, it’s all about your personal preference.

The second “off-the-cuff” dish I made was smothered cabbage, which superstition says will keep money in your wallet throughout the year if you eat it on New Year’s Day. Peas, pork, and cabbage were the three alleged New Year’s requirements when I was growing up to guarantee health, luck, and money. (The meanings differ according to different families and regions.) I, however, have never been a fan of cabbage. As a child I resigned myself to a lack of cash rather than a spoonful of cabbage. Recently, however, my mom, sister and I tasted Zea’s delicious smothered cabbage and decided to give it a shot at home. Hence, my second recipe...

So give them a shot! Or at least give them a read, and let me know what you think.

And here’s to seeing if I veer back to Recipe Lane or if I keep on my own personal road less traveled.


Cajun Meat Pies
(By Elise Michel J)

Ingredients:
1 ½ lb ground chuck (80/20 or less fat)
1 lb Jimmy Dean pork sausage (Hot)
2 onions, peeled and quartered
1 green bell pepper, quartered and cleaned
1 sweet bell pepper (yellow, orange, or red), quartered and cleaned
2 carrots, peeled and cut into large pieces
3 cloves garlic, peeled
½ cup green onions
Salt
Freshly ground pepper
Cajun seasoning
Pizza dough (prepared in a bread machine) or refrigerated pie crust (2 or 3 boxes of 2)
Vegetable oil (for frying, optional)
Parchment paper (for baking, optional)

Directions:
In a food processor, process vegetables (onion, bell peppers, garlic, and carrots).
Heat olive oil in a pot, add processed vegetables and cook for 10-15 minutes.
Add pork sausage, and cook until brown.
Add ground chuck, and cook until brown.

Add green onions and cook for 3-5 minutes.
Season with salt, pepper, and Cajun seasoning to your liking.
Let cool enough so that it can be worked with in your hands.

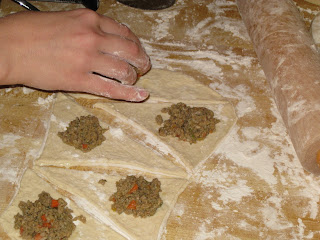
Roll out pizza or pie dough. Cut small circles (I use a Mardi Gras cup as a cutter and get about 10 circles from one refrigerated pie crust.) Place a teaspoon or so of meat filling on each circle. Wet the edges of the circle, and fold over to form the half-circle. [Wetting the edges acts as the adhesive to close the seams of dough.]


Meat pies can either be fried or baked. If frying, heat vegetable oil in a deep pan or a fryer to 350 degrees. Fry for 3 to 4 minutes, until brown and crispy. If baking, line baking sheets with parchment paper. Place meat pies on the lined baking sheets and bake for 20 minutes.


Smothered Cabbage
(By Elise Michel J)

Ingredients:
1 head cabbage, coarsely cut into large pieces
1 onion, diced
1 clove garlic, crushed
Tony Cachere’s Cajun seasoning
Cavendar’s Greek seasoning
Pepper
1 piece salt pork
1 link andouille sausage, diced
½ stick butter (4 tablespoons)
bacon grease

Cut salt pork into bite-size pieces,  (If there is a strip of fat along the side, cut the entire strip off, but do not discard. If there is a bone, do not discard.) Boil all parts of the salt pork for 5-8 minutes. Discard the bone and the strip of fat. Skim any foam off the top. Retain the water for use in the dish.

In bacon grease, cook down the onions and garlic for about 8 to 10 minutes. Add the salt pork and sausage. Cook until browned. Add freshly ground pepper (about 5 turns) and butter. Add a couple ladles of the reserved salt pork water. Add cabbage until the pot is about ¾ full. If it doesn’t all fit, let it cook down for about 10 minutes and add the rest of the cabbage. Add Tony’s and Cavendar’s, about ½ to 1 tablespoon of each (to taste). Let cook, covered for 20-30 minutes.

Note: Make sure there is still water in the pot. Add more as necessary during the first 20-30 minutes of cooking so there is still water at the bottom of the pot at the end of a half hour of cooking.

Cook uncovered for 30-45 minutes, until very soft and cooked down as much as you want it to be. Taste, and add more Tony’s and/or Cavendar’s accordingly.

Note: I use both Tony’s and Cavendar’s because I find Tony’s to have too much cayenne pepper, so use your personal preference in the seasoning of this dish.